Organizing and Sifting Physical Photos
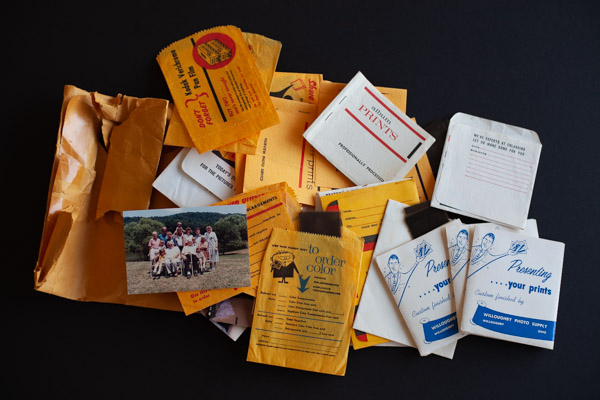
The best way to solve a big problem is to break it down into a bunch of small problems. That’s what I tell myself when I face huge photo organizing projects. For example, one of my first Family Photo Archive projects was for a client who brought me almost 12,000 prints, 12,000 negatives, and a hard drive with 12,000 scans. Everything had been digitized by another company, but none of it was organized or searchable, which means it was preserved but useless. My job was to match them all up in a Family Photo Archive that was sorted, searchable, secure, and sharable.
The challenge of matching and organized tens of thousands of files and photos is like the childhood memory game, but you’re playing with 36,000 tiles and only three-way matches are winners! Eventually you’ll find all the matches, but you need to do it as efficiently as possible because project budgets and timelines aren’t infinite.
That’s why sifting physical photos into like groupings and making my big problem a bunch of smaller problems that are easier to solve is the best option. Notice that I didn’t say I sort the photos. That will happen later, but for now I’m just sifting them. By sifting photos into like groupings, I’m identifying groups of photos that were probably taken together without actually thinking about the content of any of the photos.
Here’s how I sift:
Sift By Media
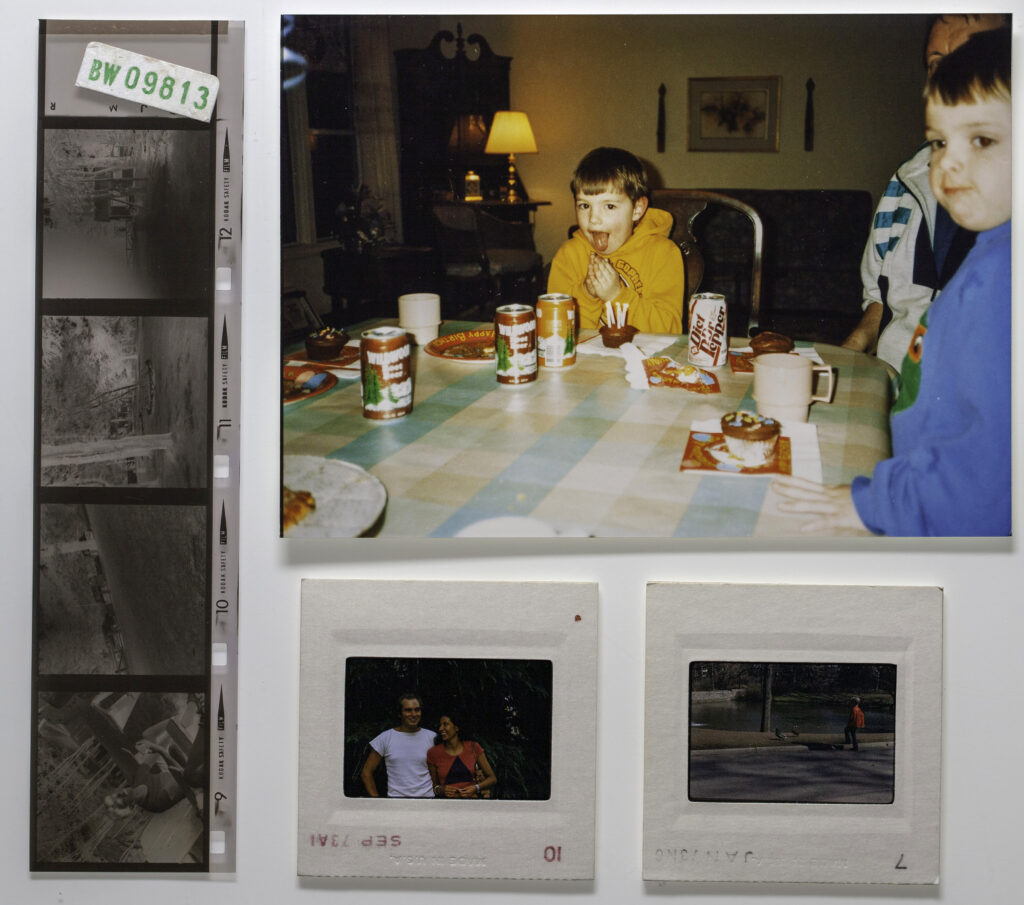
I start sifting the photos by media type and put different types in different boxes, envelopes, or stacks. Major categories I typically see include photo albums, large/framed prints (8×10 and up), medium prints (5×7), standard prints (4×6), Polaroids, negatives (not paired with prints), and slides.
Sift By Size
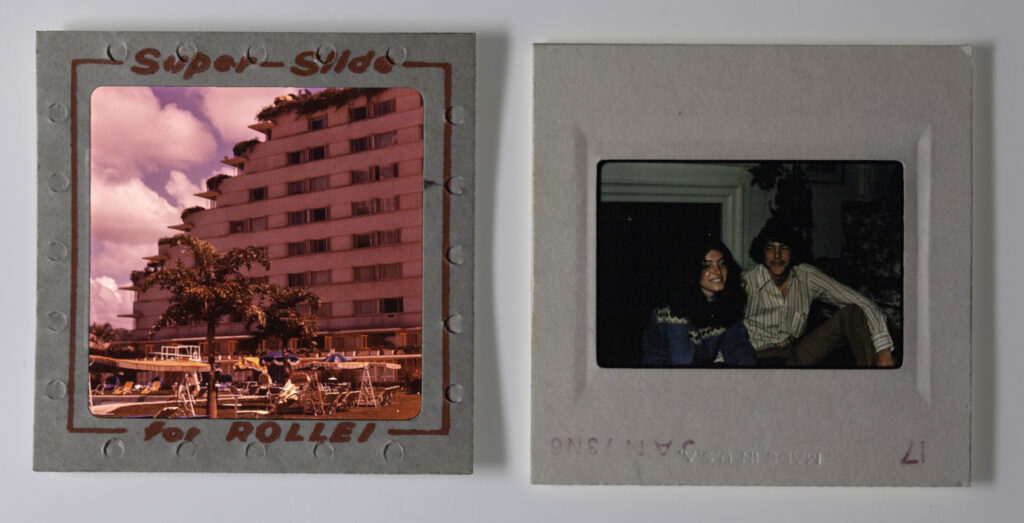
After I’ve sifted the photos by media type, then I soft them by size. For example, I group all the 4×6 prints in one area and all the 3.5×5.5 prints in another. It’s possible that a client has the same photo on both paper sizes, but that’s pretty rare. It’s more common that the 4×6 prints were produced in a certain decade while the 3.5×5.5 prints were made in a different decade. I sift oth`er media types by size, such as separating 35mm slides and 2×2 “Superslides” into separate boxes. For a great overview of some of the less common formats you might find in a photo collection check out my book, Memories: A Visual Guide to Your Photos and Videos.
Sift By Shape
The next criteria I use to sift photos is shape, which typically means separating the rectangular prints from the square prints. You might think this is no different than sifting by size, but you’ll be surprised how many square prints get mixed in with a set of 4×6 prints.
Sift By Color
What I love about this sifting process is that up to this point I haven’t had to look at any of the photos. It’s not that I don’t love to look at old photos, but it’s too slow to look at thousands of photos one at a time. Sifting by color is the first time I actually pay attention to the photos, and it’s a quick way to sift photos into smaller and smaller piles.
Sift By Edge Treatment
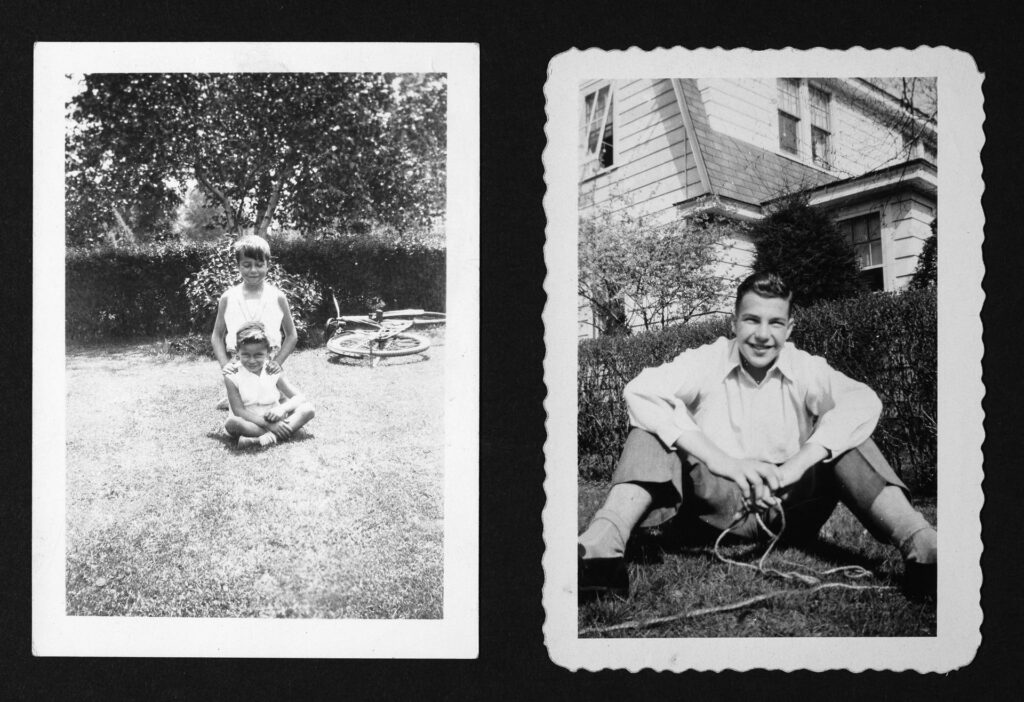
Another criteria I use to sift photos is the edge treatment. For example, if I have batch of old prints, I’ll make a pile of all the photos with deckled/scalloped edges another pile with straight edges. Another edge treatment to sift by is rounded corners (popular in the 1980s) and straight corners.
Sift By Finish
Another way to sift photos is by the finish of the paper. For example, you might sift a set of 4×6 photos into piles of glossy, matte, and textured papers.
Sift By Front Printing
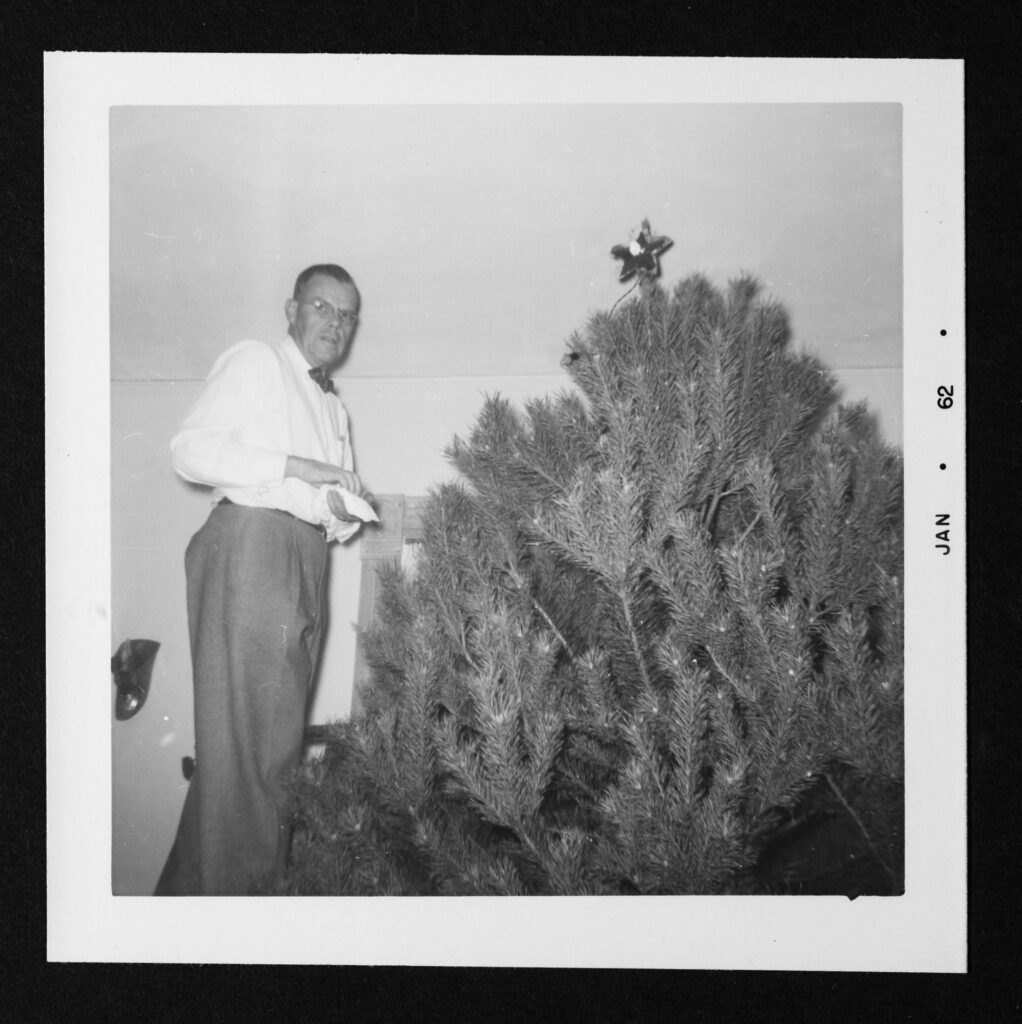
After sifting physical photos by the obvious attributes above, it’s time to unleash your inner detective. By looking at the front of a photo you might see superimposed dates (popular in the 1990s), print dates on white borders from photos from the 1950s and 1960s, or studio marks and logos that you can use to sift your photos.
Sift By Backprinting
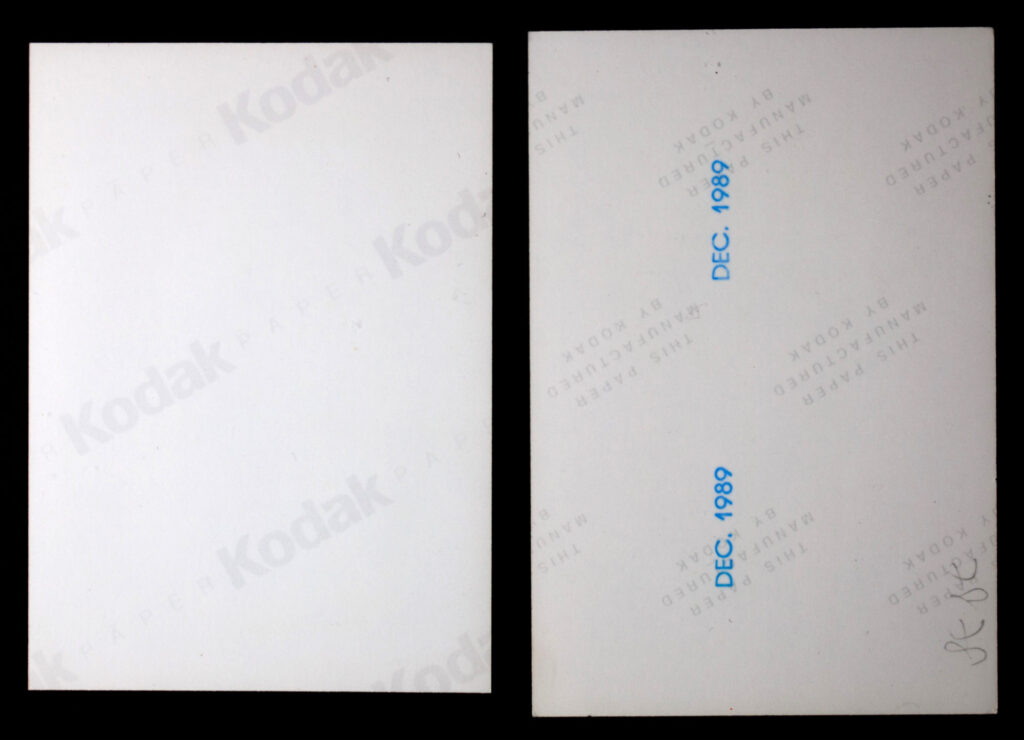
Did you know the front of a photo is not the only place to look for clues? You should also look at the backs of your photos for other ways to sift them into like groupings. Some of the details I look for include the brand of paper (Kodak, Fuji, etc.), brand logos that change over time, photo processor branding such as a local drug store, and other markings such as dates, batch numbers, or print sequence numbers. This reference from Gawain Weaver is a helpful guide to many Kodak prints.
Don’t forget that all numbers aren’t necessarily dates and even when you do find a date it probably indicates when the photo was printed, not necessarily when the photo was captured. Either way, all these details can be helpful clues to help you sift your photos.
Sift By Handwriting
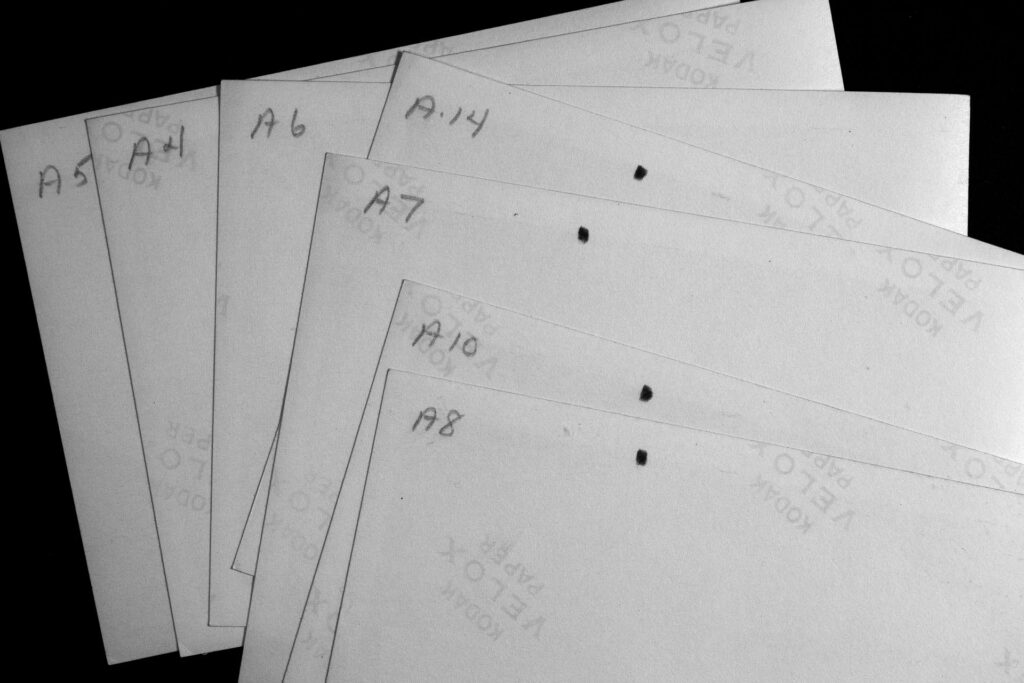
One of the most personal ways to sift photos is by personal handwriting that is sometimes on the backs of prints or on cardboard slide mounts. I look for notes and dates, but mostly I’m looking for a sequence of photos with similar handwriting in the same ink color which indicates the photos were probably taken, printed, and marked together.
Conclusion
After I’ve used these criteria for sifting physical photos into like groups, I turn the groups of photos face up and I’m always amazed. It’s like a self-working magic trick! Had I tried to sort the photos visually it would have taken much longer and wouldn’t have been as accurate. Instead, this sifting process works quickly and allows me to move on to the next phase of the project.
Interested in working with Chaos to Memories?
If you’re near Chicago and ready to get started, come visit our Wheaton Studio Monday – Friday, 10-5. Please bring your memories with you.
Contact us for more information, shipping instructions, and to get started on your project.

