
Scanning Comparison: Photo Prints
I’ve been scanning photos for more than 30 years, and photo prints are the most common photo format we scan. There are so many different ways to scan a photo, so I decided to scan the same photo with several different devices including consumer-grade scanners, pro-level equipment, and mobile apps.
For each scanner I’ve included an unedited scan, a 100% zoom screenshot so you can compare details, the image resolution, the time time it took to scan the photo, and my observations. At the end of the post I’ve included my conclusions and you can download all the original scans and compare for yourself.
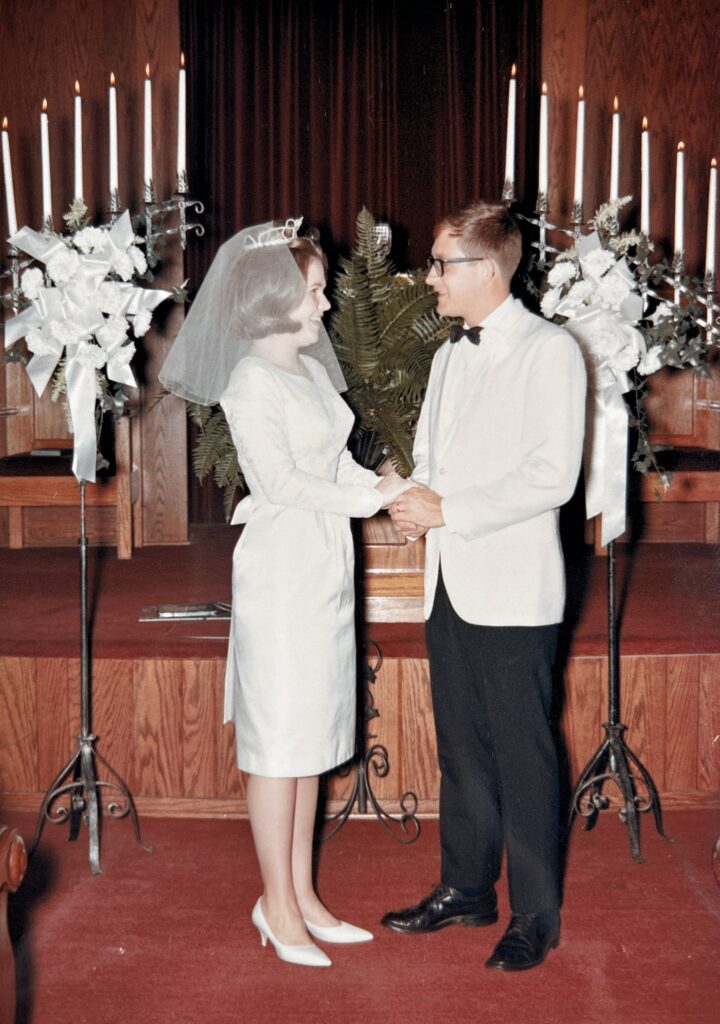
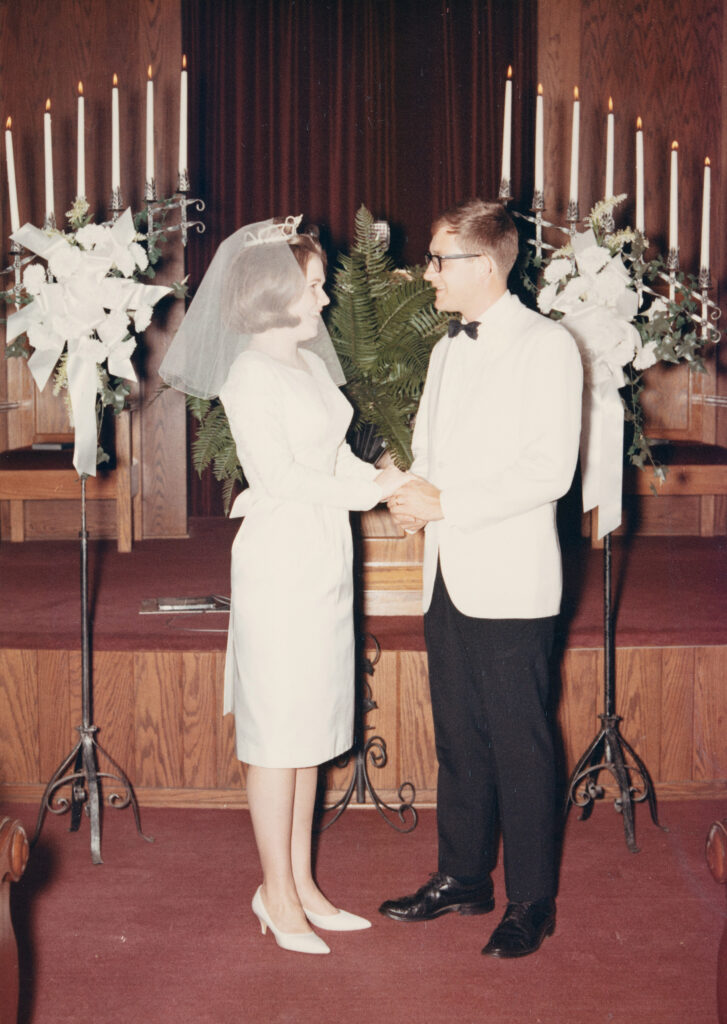
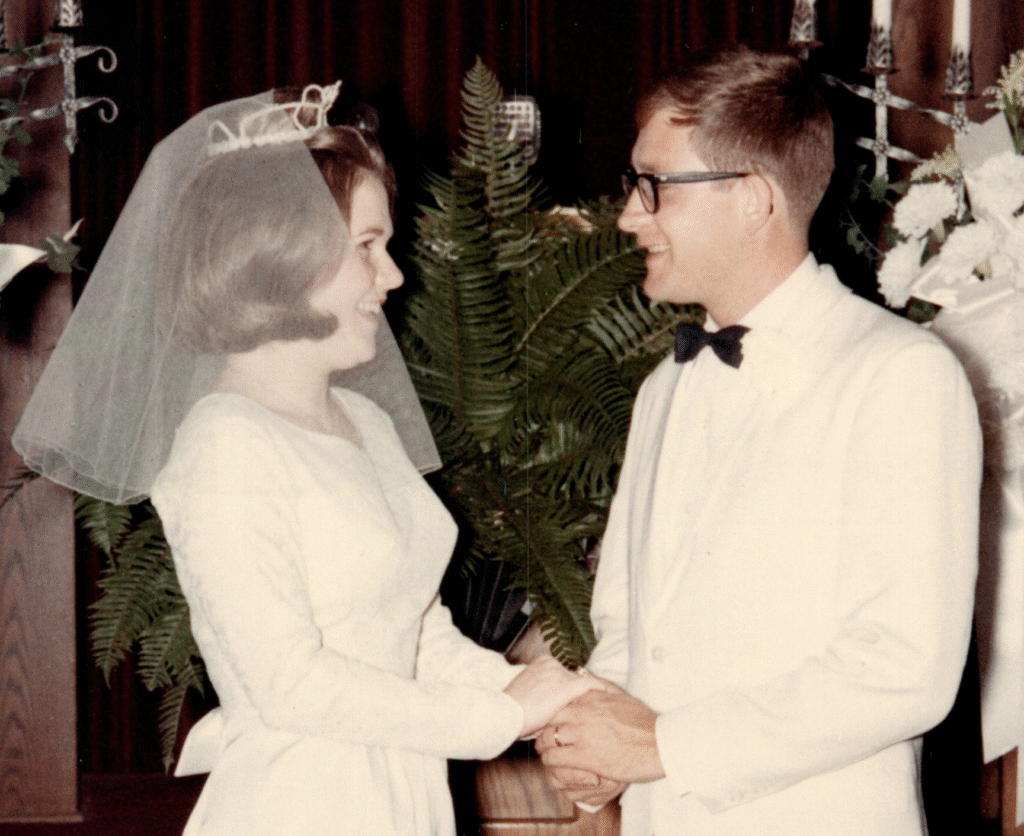
The Print
My test print is a 5×7 wedding portrait taken by a professional photographer. The exposure is good, but the contrast of the black and white clothing combined with yellowing introduce some challenges. You might notice some blemishes near the top of the photo on the curtain, which are permanently on the print. These scratches and flaws could be removed digitally with Adobe Photoshop, but my goal is to compare scanning options, not my retouching skills.
It’s also worth mentioning that the physical print is 5″ x 7″, but there’s a white border that most of the scanners removed automatically. This is important to note in case you download the images and question my image resolution calculations.
The Process
I scanned each image with the bundled software for the device and performed no post-processing (exposure, white balance, sharpening, etc.) other than cropping extra background from some of the scans. I captured each scan at 600 PPI (pixels per inch) when I could control that setting. I timed the scanning process from start to finish for each device, but I didn’t include transfer times between phone and computer. When capturing with a mobile app, the whole process will taken even longer than recorded below because you’ll probably want to transfer images from your phone to your computer.
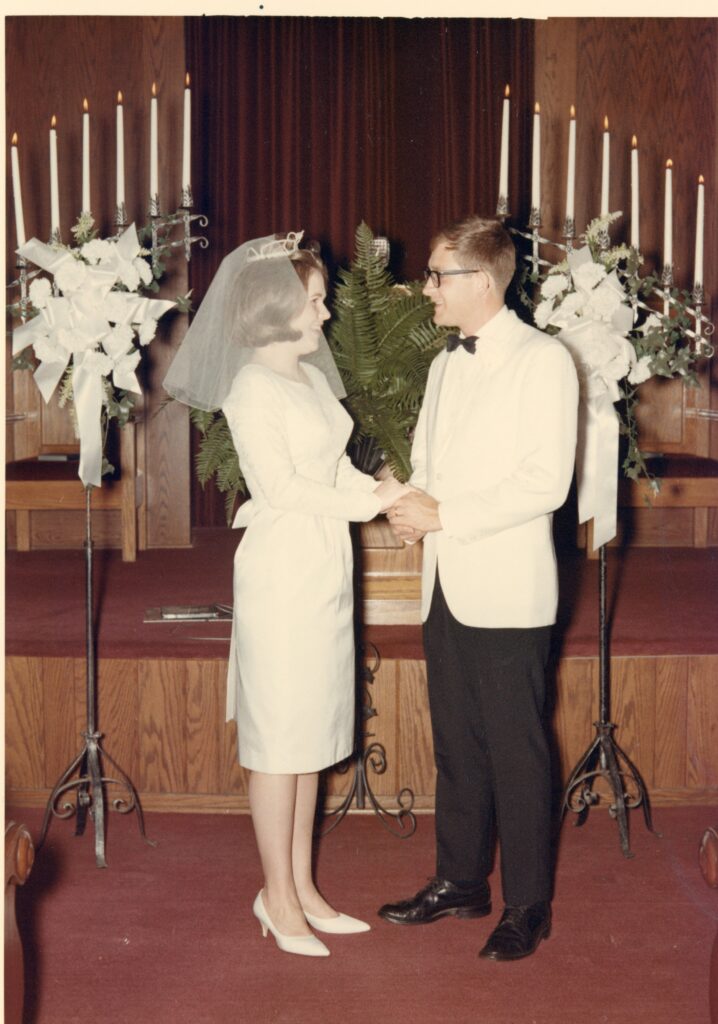
Epson V600
The Epson V600 is one of the most popular flatbed scanners on the market, but in 2025 it was discontinued and it appears that Epson has exited the pro flatbed scanner market. At this point you can only find used or refurbished units, but I decide to include this scanner in my comparison because it’s so popular.
I used the bundled Epson Scan 2 software to generate a preview image, but I didn’t include this in the scanning time. When I scanned the actual image, the process took 15 seconds and created a JPEG that’s 600 PPI (pixels per inch), 2816×4016 pixels, and 1.5 MB in size.
The image quality is pretty good, but the color is noticeably yellow/orange. The auto-detection of the image area gave disappointing results with two edges perfect and two edges off by about 1/8″ of an inch.
HP Envy 4520
The next scanner was an HP multi-function device that scans, prints, and copies photos and documents. This device was introduced in 2015 and has also been discontinued, but it’s a an all-in-one device that represents typical results.
Scanning the same photo print at 600 PPI took 43 seconds, which was about three times slower than the Epson V600 and much slower than any other device I tested. The JPEG file it produced was 2816×3976 pixels and 1.6 MB in size.
The scanned image has a noticeable green color cast and aggressive sharpening has been applied without any user control. As you can see in the third image below, when you view the image at 200% you can see jagged edges and over-sharpening in high-contrast areas.
Photomyne App
Photomyne is a popular mobile app for iPhone and Android that claims to offer “the world’s best photo scanning apps.” I’ve been scanning photos for decades and understand how tedious this work can be, so the claim that “Photomyne is the fastest and easiest way to turn photos, slides, negatives, and other family keepsakes into a digital library” got my attention.
The scanning process only took 5 seconds, but the steps to save the photo to my camera roll and transfer it to my computer took ten more seconds. In an attempt to get the best possible results, I used a professional copy stand and LED studio lights to ensure the print was illuminated evenly and the camera was mounted straight.
The app offers two quality options called “Good” and “Print”, but the image output resolution was 2584×3676 pixels for both. The “Good” option exported a 2MB file and the “Print” option exported a 2.2MB file, but after completing a pixel-for-pixel comparison of the entire image I couldn’t find any visual differences that would account for the 10% difference in file size. The effective resolution of both images was 544 PPI.
The image quality is okay for a mobile app, but several issues caught my eye. For better or worse, Photomyne applied a white balance adjustment and added contrast to the image which made the dress and jacket more white than they are in the print. This is probably how the photo looked before decades of aging, but I’m hesitant to use automatic adjustments because if they go too far I can’t control or undo them. The next flaw I noticed is that there is an unexpected light patch over the groom’s legs that isn’t in the photos. Finally, there’s optical distortion that affects the geometry of the whole image and the image is cropped tighter than any other scanner in this test.
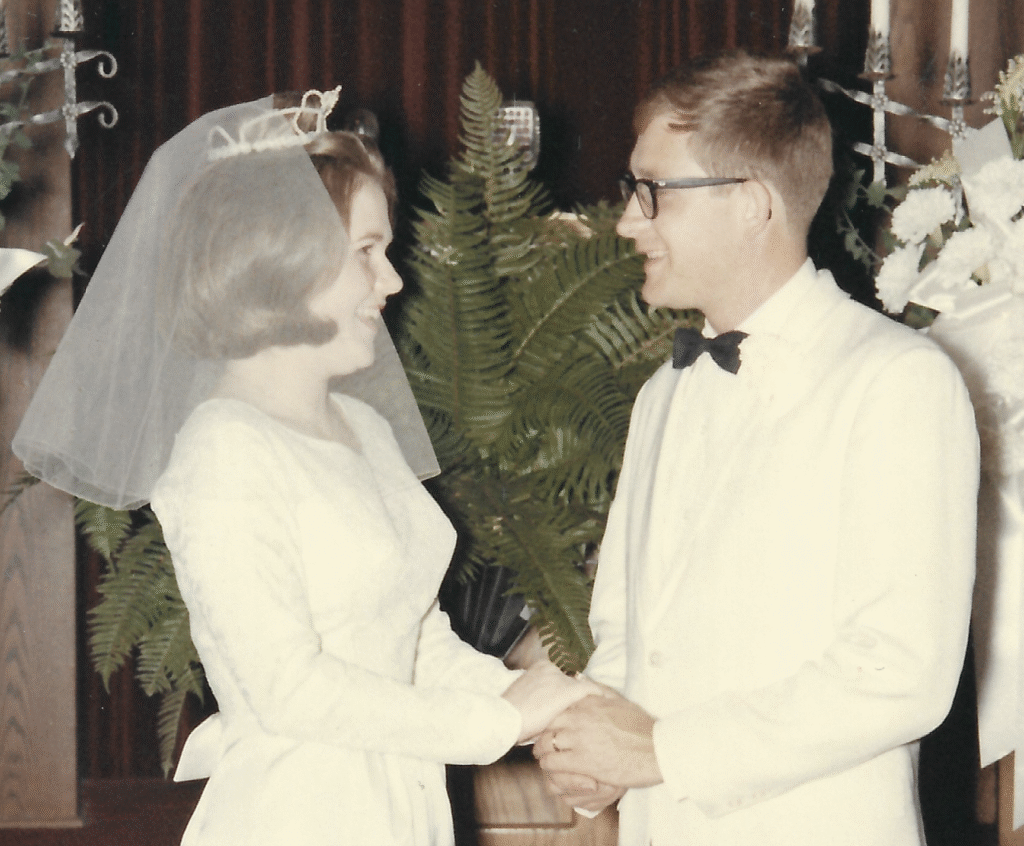
Camera App on iPhone
The issues with the Photomyne image left me wondering if the crux of the problem was the app or the phone, so for the next test I decided to use the same iPhone with just the built-in camera app. Using the same copy stand and studio light setup, this capture and crop took six seconds and created a JPEG with pixel dimensions of 2522×3599, a file size of 1.8MB, and a resolution of 531 PPI.
This image has more faithful color, less optical distortion, and a better crop than the image from Photomyne, but there’s still an unexpected light patch on the groom’s legs. I’m not convinced the image from Photomyne is any better than what I captured with the built-in camera app, but the automatic cropping of Photomyne will save you time.
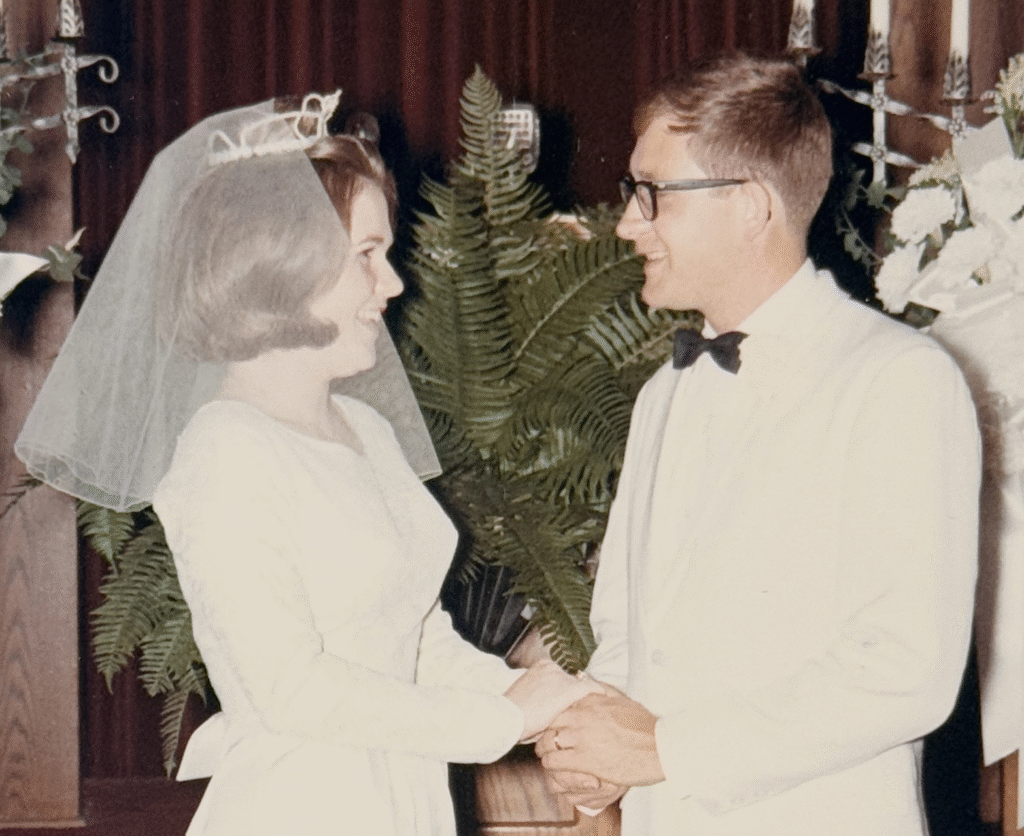
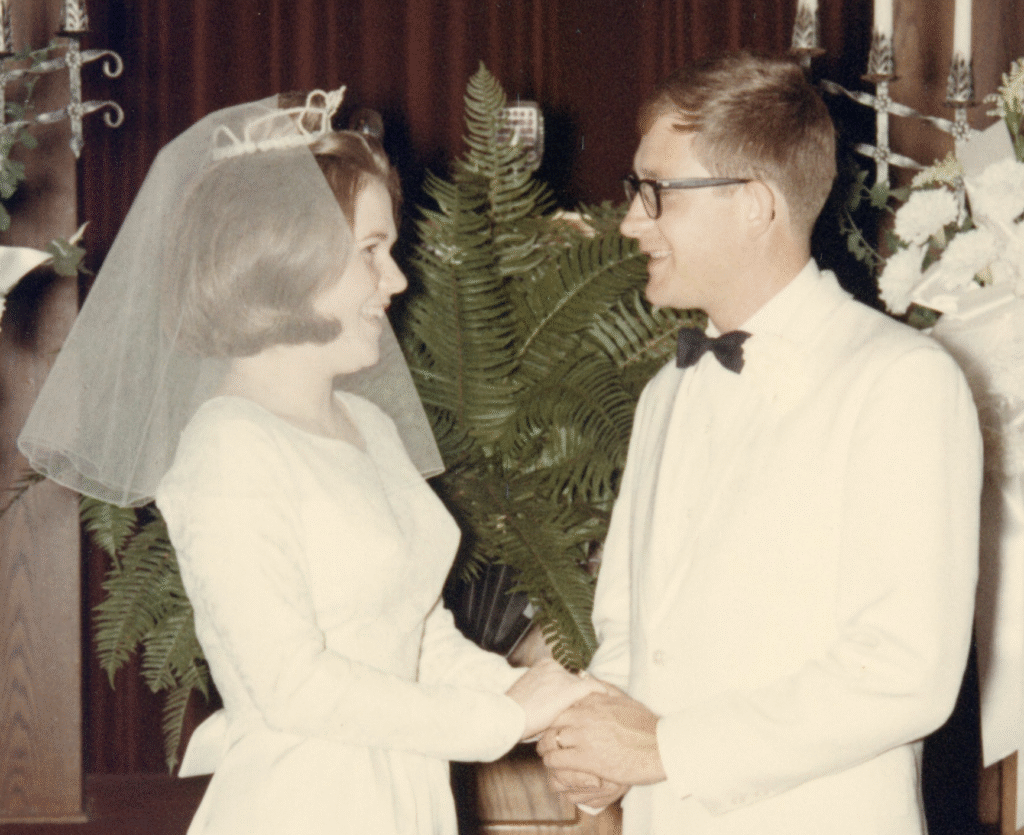
Camera Scan with Canon 5DSR
Camera scanning is the process of using digital cameras to digitize photographic materials. We used a Canon 5DSR digital camera, professional macro lens, copy stand, and LED studio lights.
The process of capturing and cropping the image took eleven seconds and created a JPEG that’s 2816×3969 pixels, 2.9 MB in size, and a resolution of 600 PPI. The capture only takes 1/80 of a second, but it takes a few more seconds to transfer the image from the camera to the computer and then rotate and crop the image in Adobe Lightroom Classic.
No other post-processing (white balance, exposure, contrast, etc.) was applied to the image and it is definitely the most faithful to the original print.
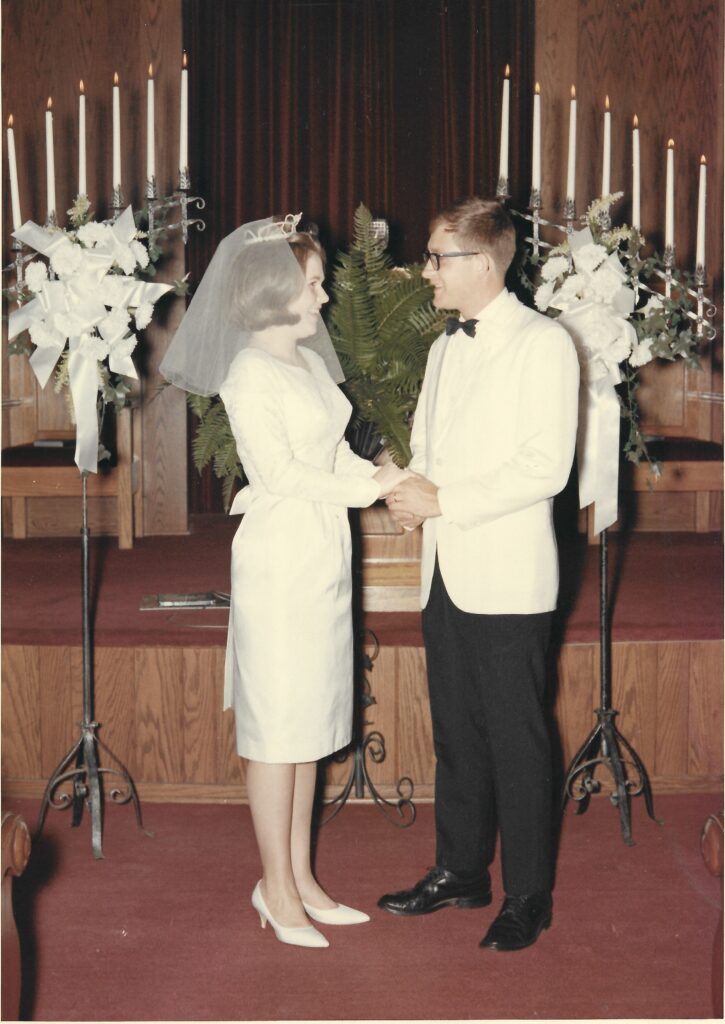
Epson FastFoto FF-680W
The last scanner I tested is the popular Epson FastFoto FF-680W, which uses an ADF (Auto Document Feeder) to scan up to 36 stacked prints at a time. From the moment I clicked the scan button to the moment the JPEG was saved to the hard drive was 11 seconds. The JPEG is 1.8 MB, the image dimensions are 3012×4223 pixels, and the effective resolution is 602 PPI.
The overall image quality and color fidelity are good, but there are two important flaws. The first issue is that the scan is significantly darker than the original print and all the other scan results. This was most noticeable in the curtain behind the bride and groom and the grooms pants which lost a lot of detail.
The second issue isn’t obvious at first, but if you look closely there’s a vertical white line down the middle of the photo. Lines like this are caused by specs of dust on the scanning element and are a common issue with ADF scanners. With flatbed scanners like the Epson V600 and planetary scanners like camera scanning, a spec of dust is just a spec of dust. But with an ADF scanner a spec of dust turns into a white, pink, or orange line across the entire image. My sample print was undamaged, but many users complain that these dust specs cause permanent scratches on their prints.
Conclusion
I love scanning photos, but it’s a tedious process. Therefore, it’s important to get the best quality with the most efficient process. Here’s a summary table of the print scanning options I tested:
| Scanning Device/App | Time in seconds | File size in MB | Pixel dimensions | Image resolution |
| Epson V600 | 15 | 1.5 | 2816×4016 | 593 PPI |
| HP Envy 4520 | 43 | 1.6 | 2816×3976 | 593 PPI |
| Photomyne app good quality | 5 | 2 | 2584×3676 | 544 PPI |
| Photomyne app print quality | 5 | 2.2 | 2584×3676 | 544 PPI |
| iPhone 16 Pro Camera app | 6 | 1.8 | 2522×3599 | 531 PPI |
| Camera scan (Canon 5DSR) | 11 | 2.9 | 2816×3969 | 593 PPI |
| Epson FastFoto FF-680W | 11 | 1.8 | 3012×4223 | 602 PPI |
The HP scanner was by far the slowest device and created the worst digital image, which is why I don’t recommend scanning photos with an all-in-one device. It just doesn’t make sense to spend more time for worse results.
The images from the mobile apps look okay on their own, but when you compare them with the original print you start to notice changes in color and lighting, tight crops, and optical distortion. The lenses and sensors in a camera phone are fun for life’s snapshots, but they just aren’t designed for high-quality digitization.
The image from the Epson V600 was good except for the yellow color cast, but the scanning process is really slow and the scanner has been discontinued. Considering flatbed scanners haven’t evolved in 30+ years and are disappearing from the market, I don’t recommend this option.
The marketing of the Epson FastFoto is compelling, but the dark images and required cleaning are huge drawbacks. Epson recommends turning off the power, disconnecting all cables, opening the scanner, and cleaning the rollers and scanning elements after every 300 scans. The fact that scratched prints are common with this scanner renders the FastFoto unusable in my book.
Camera scanning requires more expensive equipment and setup, but the digital image is the best of this lineup. Camera scanning also offers the flexibility to digitize many sizes and formats with the same equipment. Because of the quality, flexibility, and efficiency of the overall workflow, we exclusively use the camera scanning method in the Chaos to Memories studio. If you want to learn more about camera scanning, we offer an online course called The Practical Guide to Camera Scanning.
Want to see the results for yourself? Download the original scans here.
Interested in working with Chaos to Memories?
If you’re near Chicago and ready to get started to work with a professional photo organizer, come visit our Wheaton Studio Monday – Friday, 10-5. Please bring your memories with you.
If you live outside the Chicagoland area, we’re happy to send you a Project Form and Contract, along with shipping instructions, so you can get started on your project.
Contact us for more information.